

Building a Single-Node Rate Limiter with Redis in Node.js
Introduction
Rate limiting is a way of controlling how frequently a client can access an API.
Without rate limiting, a single client could send a large number of requests in a short period of time. This can consume server resources, overload an API, or make it easier for abusive traffic to affect other users.
In this project, I wanted to understand how rate limiting actually works by implementing three common algorithms using Node.js, Express, and Redis:
Fixed Window
Sliding Window
Token Bucket
The application is currently a single-node setup. The Node.js application handles incoming requests, while Redis stores the rate-limiting state.
The basic architecture looks like this:
Client
   |
   v
Node.js / Express
   |
   v
Rate Limiter Middleware
   |
   v
Redis
The middleware determines who is making the request, checks the corresponding rate-limiter algorithm, and either allows the request to continue or returns an HTTP 429 Too Many Requests response.
The goal of this project was not just to make an endpoint return 429. It was to understand how different rate-limiting algorithms store state, how time affects their behavior, and where concurrency and atomicity become important.
In the following sections, I will walk through each algorithm and how I implemented it with Redis.
Project
The complete implementation, tests, and examples are available in the GitHub repository: Github Repo
The project currently provides a Redis-backed rate limiter for a single Node.js application instance, with support for Fixed Window, Sliding Window, and Token Bucket algorithms.
Visualizing the Algorithms
Before implementing the algorithms, I used an interactive rate limiter simulator to understand how their behavior differs under different traffic patterns.
The simulator helped me visualize:
how Token Bucket allows bursts and gradually refills tokens
how Fixed Window resets at fixed time boundaries
how Sliding Window evaluates requests over a rolling period
how requests are accepted or rejected with HTTP 429
You can experiment with the simulator here: Rate Limiter Simulator
Project Setup
For this project, I used Node.js and Express for the application layer and Redis to store the rate-limiting state.
The main technologies used were:
Node.js
Express.js
Redis
ioredis
Bruno for API testing
The project started as a simple Express application with three endpoints, one for each rate-limiting algorithm:
/api/fixed-test— Fixed Window/api/sliding-test— Sliding Window/api/token-bucket-test— Token Bucket
Each endpoint uses the same rate-limiter middleware, but the middleware is configured with a different algorithm.
The basic project structure eventually became:
RateLimiter/
├── src/
│   ├── index.js
│   ├── fixed-window.js
│   ├── sliding-window.js
│   └── token-bucket.js
├── examples/
│   └── basic.js
├── test/
│   ├── fixed-window.test.js
│   ├── sliding-window.test.js
│   └── token-bucket.test.js
├── README.md
├── LICENSE
├── package.json
└── package-lock.json
Understanding the Express Middleware Flow
Before looking at the individual rate-limiting algorithms, it is useful to understand how a request moves through the application.
The main function exposed by the package is rateLimiter(). It acts as a middleware factory: it receives the rate-limiter configuration and returns an Express middleware function.
A simplified flow looks like this:
Client Request
     |
     v
rateLimiter(...)
     |
     v
Generate client key
     |
     v
Run selected algorithm
     |
     +--------+
     |        |
   Allow    Reject
     |        |
     v        v
  next()     429
     |
     v
Route Handler
The middleware can be configured with different algorithms:
const limiter = rateLimiter({
    redis,
    type: 'fixed',
    limit: 5,
    windowSize: 10000
});
The redis client is passed into the limiter so that the rate limiter can use the application's existing Redis connection instead of creating a new Redis connection for every limiter.
The type determines which algorithm should be used:
type: 'fixed'
or
type: 'sliding'
or
type: 'token'
When a request arrives, the middleware first generates a key to identify the client:
const key = keyGenerator ? keyGenerator(req) : req.ip;
By default, the client's IP address is used. A custom keyGenerator can also be provided when the application needs a different identity, such as a user ID or API key.
The selected algorithm then returns either true or false.
If the request is allowed:
next();
is called. next() tells Express to continue processing the same request and move to the next function in the middleware chain, which in this case is the route handler.
If the request is rejected, the middleware stops the chain and returns:
return res.status(429).json({
    error: 'Rate limit exceeded'
});
This means the route handler never executes for a request that has exceeded the configured limit.
With this common middleware flow in place, the three algorithms can use the same interface while implementing their rate-limiting logic differently.
Fixed Window: The Simplest Counter
The Fixed Window algorithm is the simplest of the three algorithms implemented in this project.
The basic idea is straightforward:
Allow a fixed number of requests during a fixed period of time.
For example, the limiter can be configured as:
{
    type: 'fixed',
    limit: 5,
    windowSize: 10000
}
This means a client can make 5 requests within a 10-second window.
How it works
For every client, Redis maintains a counter.
The implementation creates a Redis key based on the client identifier:
const key = "Rate:" + userId;
When a request arrives, the counter is incremented:
const count = await redis.incr(key);
If this is the first request in the window, the key receives an expiration time:
if (count === 1) {
    await redis.expire(key, Math.ceil(windowSize / 1000));
}
The counter is then compared with the configured limit:
if (count > limit) {
    return false;
}

return true;
So with a limit of 5, the requests behave like this:
Request 1 → count = 1 → allowed
Request 2 → count = 2 → allowed
Request 3 → count = 3 → allowed
Request 4 → count = 4 → allowed
Request 5 → count = 5 → allowed
Request 6 → count = 6 → rejected
Once the Redis key expires, the counter disappears and the client gets a new window.
Redis state
The Redis state is very simple:
Rate:<client>
      |
      └── integer counter
For example:
Rate:192.168.1.10 → 4
The key also has a TTL representing the remaining lifetime of the current window.
The main limitation
The biggest issue with Fixed Window is the window boundary.
For example, suppose the limit is 5 requests per 10 seconds:
00:00 → 00:10
A client could potentially make:
00:09.9 → 5 requests
00:10.0 → 5 requests
That is 10 requests very close together, even though the configured limit is only 5 per 10-second window.
This is known as a boundary burst.
The advantage is that Fixed Window is extremely simple and inexpensive to implement. The tradeoff is that its time boundaries make it less precise than a sliding window.
Sliding Window: Timestamps in a Sorted Set
The Sliding Window algorithm improves on the boundary problem of the Fixed Window approach by looking at the actual timestamps of recent requests rather than maintaining only one counter.
Instead of dividing time into fixed blocks, we maintain a moving window of time.
For example, with:
{
    type: 'sliding',
    limit: 5,
    windowSize: 10000
}
the limiter asks:
How many requests has this client made during the last 10 seconds?
Storing timestamps in Redis
For the Sliding Window implementation, Redis uses a Sorted Set.
The key is:
const key = `Rate:Sliding:${userId}`;
Each request is stored with its timestamp as the sorted-set score.
Conceptually, the Redis state looks like:
Rate:Sliding:user123

timestamp        request
---------        -------
1710000010000    request-1
1710000012000    request-2
1710000015000    request-3
1710000018000    request-4
The timestamp allows Redis to order the requests chronologically.
Moving the window
When a new request arrives, the Lua script first calculates the beginning of the current window:
local windowStart = now - WINDOW_SIZE
For a 10-second window:
now = current timestamp
windowStart = now - 10 seconds
Requests older than that point are removed:
redis.call('ZREMRANGEBYSCORE', key, 0, windowStart)
The remaining requests are then counted:
local count = redis.call('ZCARD', key)
If the count is below the configured limit, the new request is added:
redis.call('ZADD', key, now, randomValue)
So the overall process is:
New request
    |
    v
Calculate window start
    |
    v
Remove old timestamps
    |
    v
Count remaining timestamps
    |
    v
Count < limit?
   /       \
 Yes       No
  |         |
  v         v
Add       Reject
timestamp
  |
  v
Allow
Why use a Sorted Set?
A Redis Sorted Set is useful here because each request can be associated with a timestamp and Redis keeps the entries ordered by their score.
That gives us the operations we need:
Remove timestamps older than the window
Count requests currently inside the window
Add the new request timestamp
Compared with Fixed Window, we are no longer dependent on an arbitrary boundary such as 00:00 or 00:10.
The window moves with each request.
The important problem: concurrency
There is another issue, though.
These operations need to behave as one atomic operation:
Remove old requests
       ↓
Count requests
       ↓
If allowed → add new request
If these were separate Redis commands, two requests arriving at almost the same time could both observe the same count before either request is added.
That's where the Lua script becomes important.
Why the Sliding-Window Lua Script Must Be Atomic
The Sliding Window algorithm performs several Redis operations for every request:
Remove expired timestamps
        ↓
Count remaining requests
        ↓
Check the limit
        ↓
Add the new timestamp
If these operations were sent to Redis as separate commands, concurrent requests could interfere with each other.
For example, suppose the limit is 5 and Redis currently contains 4 requests.
Two requests arrive at almost the same time:
Request A → sees count = 4 → allowed
Request B → sees count = 4 → allowed
Both requests may decide that there is room for another request before either one adds its timestamp. This can result in the limit being exceeded.
Using Lua
I put the complete decision-making process into a Redis Lua script:
redis.call('ZREMRANGEBYSCORE', key, 0, windowStart)

local count = redis.call('ZCARD', key)

if (count < limit) then
    local randomValue = now .. "-" .. math.random()

    redis.call('ZADD', key, now, randomValue)

    redis.call('EXPIRE', key, math.ceil(WINDOW_SIZE/1000)+1)

    return 1
else
    return 0
end
Instead of the Node.js application performing each operation independently, it sends the operation to Redis as one script.
Conceptually:
Node.js
   |
   | one Lua script
   ↓
Redis
   |
   ├── remove old timestamps
   ├── count requests
   ├── check limit
   └── add timestamp
Redis executes the Lua script atomically, so another Redis command cannot execute in the middle of that script.
The Node.js code then only needs to interpret the result:
const allowed = await redis.slidingWindow(
    key,
    now,
    windowSize,
    limit
);

return allowed === 1;
Here, 1 means the request was allowed and 0 means it was rejected.
Why this matters
The Lua script is not just an optimization. It protects the correctness of the rate limiter under concurrent requests.
This was one of the important differences between simply implementing the algorithm and understanding how it behaves when multiple requests arrive at the same time.
Token Bucket: Bursts and Gradual Refilling
The Token Bucket algorithm approaches rate limiting differently from the Fixed Window and Sliding Window algorithms.
Instead of counting requests, it maintains a bucket of tokens.
Each request consumes one token. Tokens are gradually added back to the bucket at a configured refill rate.
For example, this configuration:
{
    type: 'token',
    capacity: 5,
    refillRate: 1
}
means:
The bucket can hold at most 5 tokens.
Tokens are refilled at 1 token per second.
Each allowed request consumes 1 token.
Initial state
When a client first uses the limiter, the Lua script initializes a new bucket with the configured capacity. With capacity = 5, the first request sees a bucket containing 5 tokens before consuming one.
Bucket capacity = 5

[ ● ● ● ● ● ]
  5 tokens
The client can therefore make several requests immediately.
After five requests:
[           ]
  0 tokens
The next request is rejected unless tokens have been refilled.
Gradual refill
Unlike a fixed window, the bucket doesn't suddenly reset after a particular period.
With:
refillRate = 1 token/second
After the initial tokens have been consumed and the bucket reaches zero, the refill process works like this:
0 seconds → 0 tokens
1 second  → 1 token
2 seconds → 2 tokens
3 seconds → 3 tokens
...
The bucket can never exceed its configured capacity.
So if the capacity is 5:
tokens = min(capacity, tokens + refilledTokens)
This allows controlled bursts while still limiting the long-term request rate.
Redis state
The implementation needs to remember two pieces of information:
Token bucket state

<key>
   └── current token amount

<key>:lastRefill
   └── timestamp of the last refill
The timestamp is necessary because the limiter needs to calculate how much time has passed since the previous refill.
Conceptually:
Request
   ↓
Read token count + last refill time
   ↓
Calculate elapsed time
   ↓
Calculate tokens to add
   ↓
Cap tokens at capacity
   ↓
Enough tokens?
   ├── Yes → consume 1 token → allow
   └── No  → reject
Why Lua is used here
Just like the Sliding Window algorithm, the Token Bucket performs several operations that need to work together.
The implementation calculates the refill, updates the token count, updates the timestamp, and decides whether the request is allowed.
These operations are handled by a Redis Lua script so that the state transition happens atomically.
The Node.js side passes the configuration into the Redis command:
const allowed = await redis.tokenBucket(
    key,
    key + ":lastRefill",
    now,
    refillRate,
    capacity
);
Here, refillRate represents the number of tokens that should be added per second.
The Lua script uses that value together with the elapsed time to determine how many tokens should be restored.
This makes the Token Bucket different from the previous algorithms: instead of asking "How many requests happened?", it asks "How many tokens are currently available?"
Verifying refillRate from Node.js to the Redis Lua Script
The Token Bucket algorithm depends on the refill rate being passed correctly through every layer of the implementation.
In the Express route, the limiter is configured with:
const limiter = rateLimiter({
    redis,
    type: 'token',
    capacity: 5,
    refillRate: 1
});
Here:
capacity = 5
refillRate = 1 token/second
The rateLimiter() middleware receives these options and passes them to the Token Bucket implementation:
allowed = await isAllowedTokenBucket(
    redis,
    key,
    capacity,
    refillRate
);
The Token Bucket function then passes refillRate to the Redis Lua command:
const allowed = await redis.tokenBucket(
    key,
    key + ':lastRefill',
    now,
    refillRate,
    capacity
);
Because the Redis command is configured with:
redis.defineCommand('tokenBucket', {
    numberOfKeys: 2,
    lua: TokenBucket_Script
});
the arguments are divided between KEYS and ARGV.
The first two arguments are Redis keys:
KEYS[1] → key
KEYS[2] → key:lastRefill
The remaining arguments become:
ARGV[1] → now
ARGV[2] → refillRate
ARGV[3] → capacity
The Lua script can therefore retrieve the refill rate with:
local refillRate = tonumber(ARGV[2])
and use it when calculating how many tokens should be restored.
The complete flow is:
Express configuration
        |
        | refillRate = 1
        ↓
rateLimiter()
        |
        ↓
isAllowedTokenBucket()
        |
        | refillRate
        ↓
redis.tokenBucket()
        |
        ↓
Redis Lua script
        |
        | ARGV[2]
        ↓
refillRate
While revisiting the implementation, I specifically traced refillRate through each layer to make sure the configured value was actually reaching the Lua script. The refill rate needs to reach the Lua script and participate in the refill calculation for the configured behavior to be meaningful.
Testing the Rate Limiter and HTTP 429 Responses
After implementing the three algorithms, I tested them by sending requests to the Express endpoints.
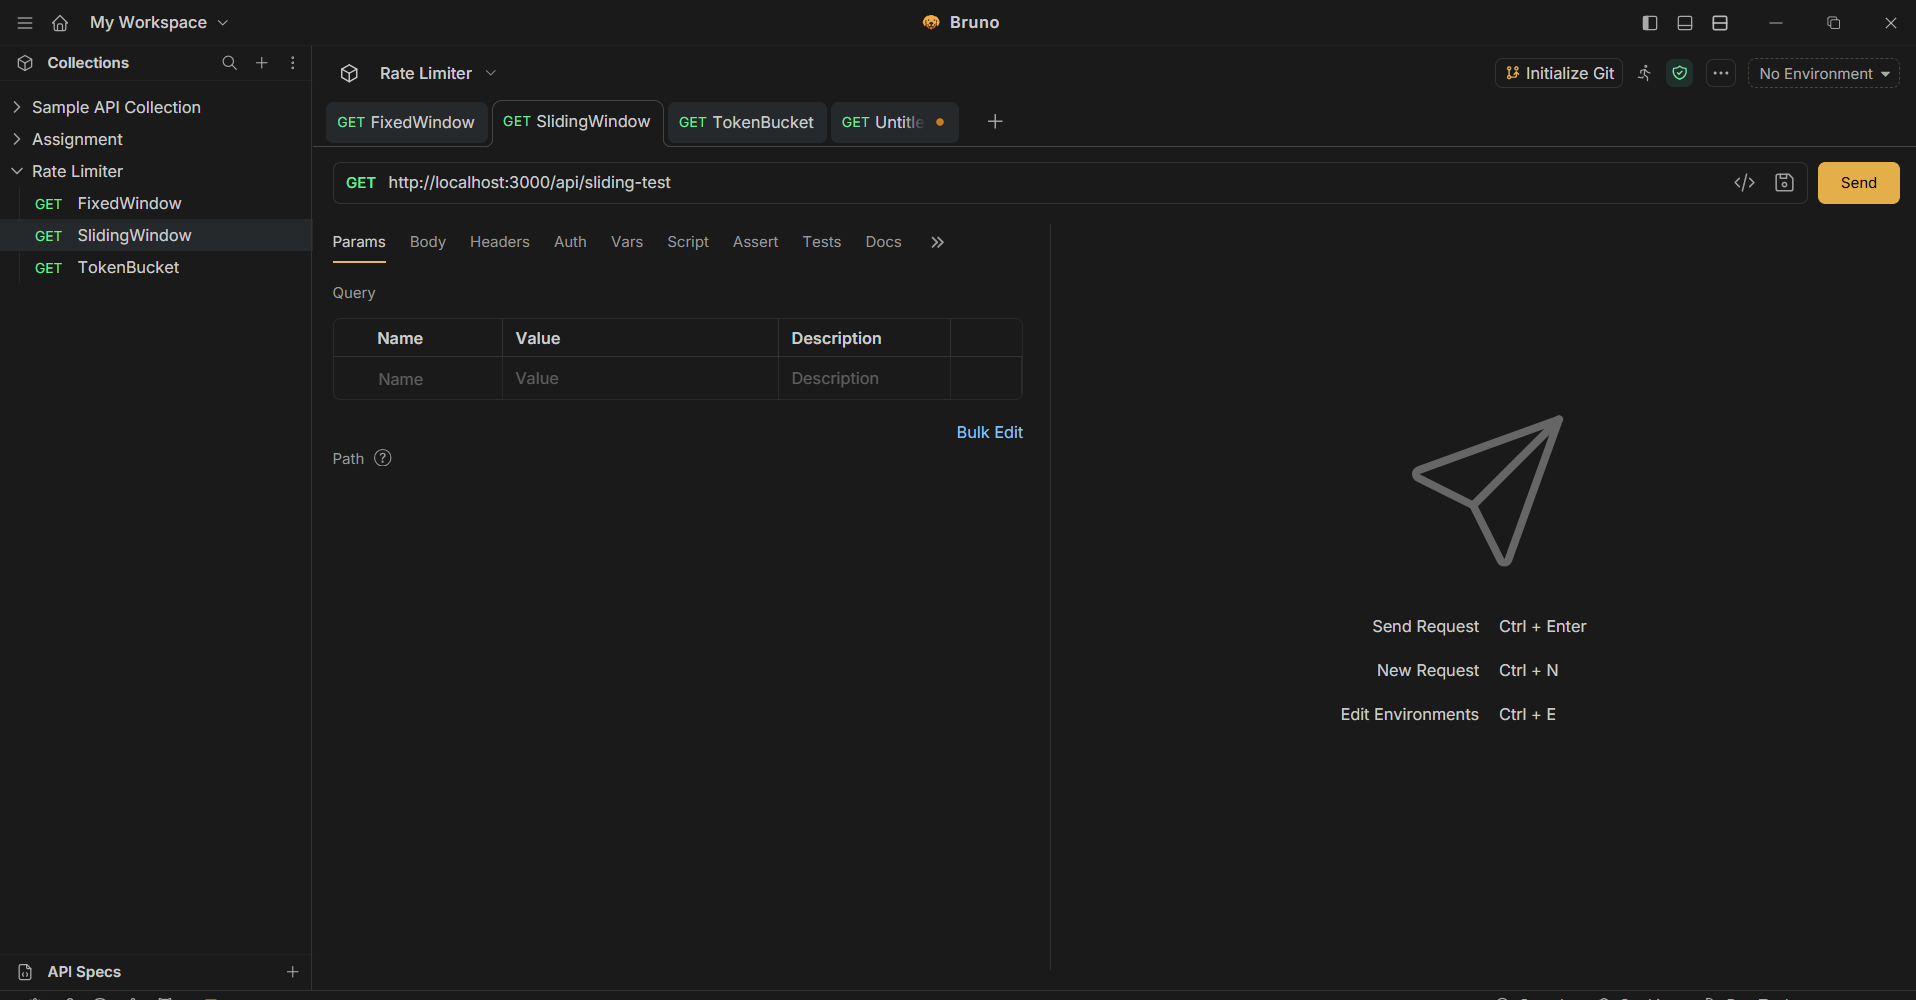
The basic test configuration was:
{
    limit: 5,
    windowSize: 10000
}
for the Fixed Window and Sliding Window limiters, and:
{
    capacity: 5,
    refillRate: 1
}
for the Token Bucket.
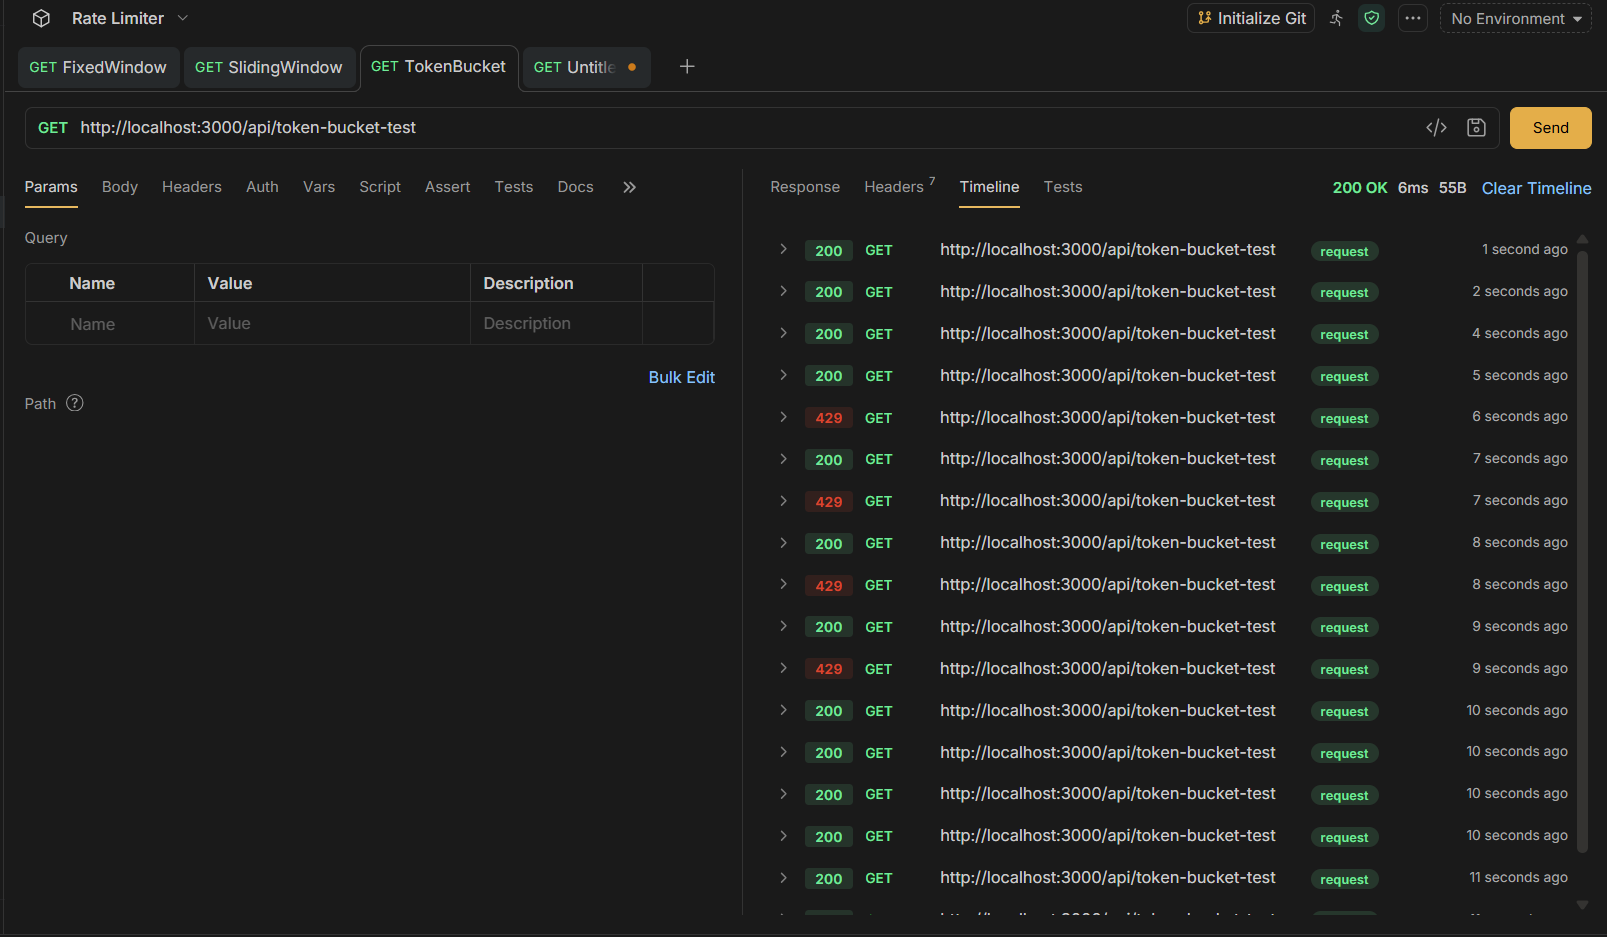
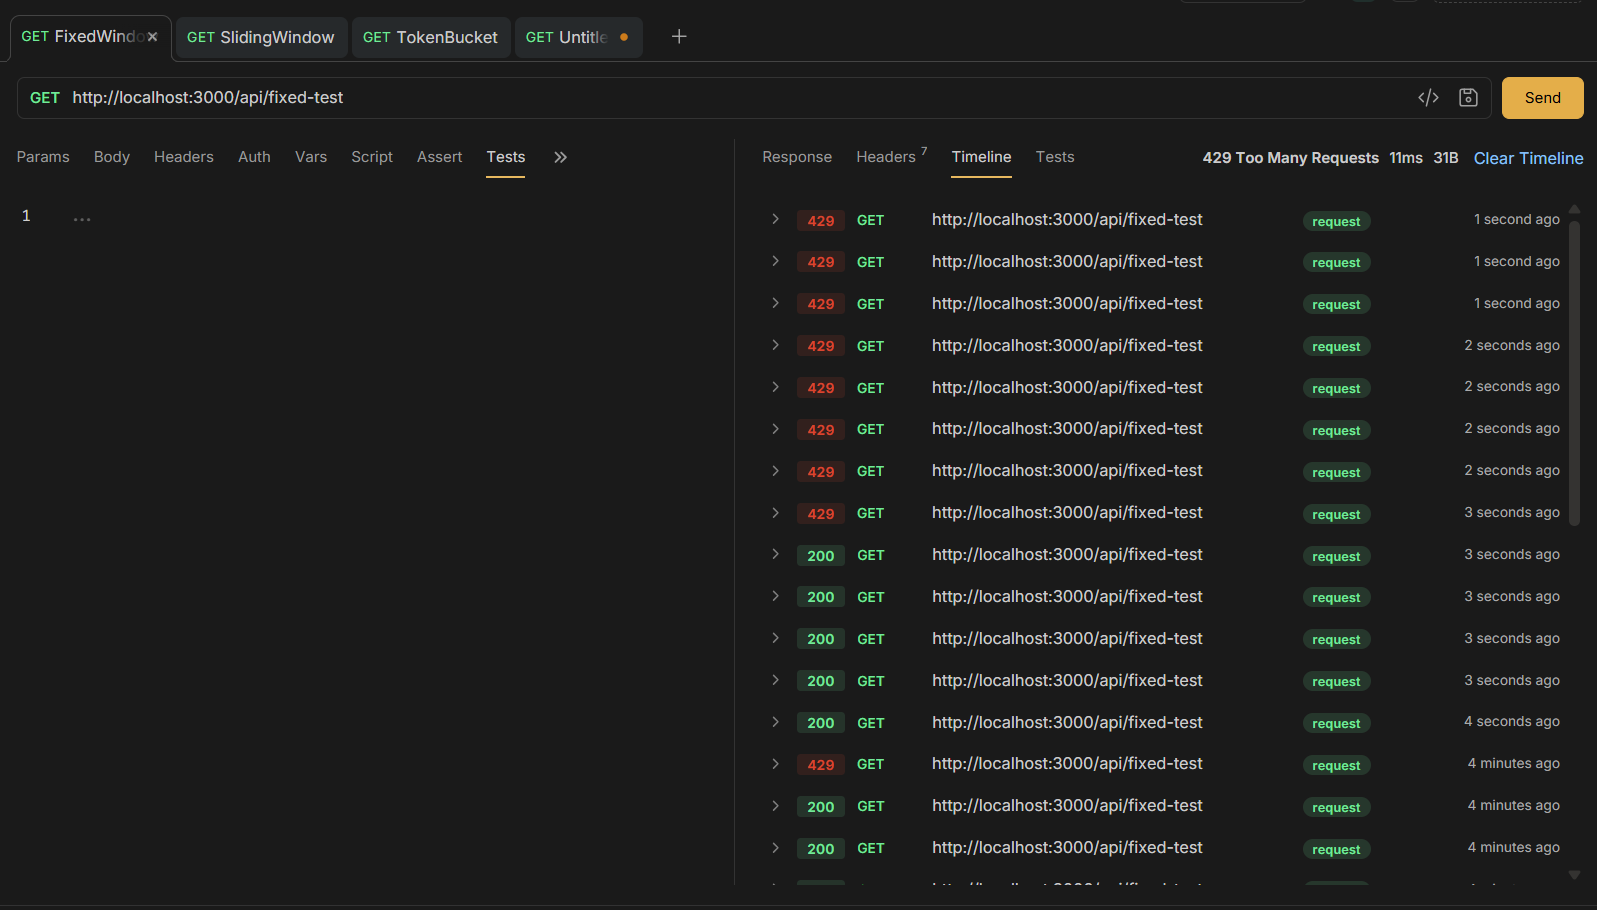
Testing the request limit
For example, with the Fixed Window limiter configured for 5 requests per 10 seconds, the first five requests should be accepted:
Request 1 → 200
Request 2 → 200
Request 3 → 200
Request 4 → 200
Request 5 → 200
The sixth request exceeds the configured limit:
Request 6 → 429
The middleware returns:
{
    "error": "Rate limit exceeded"
}
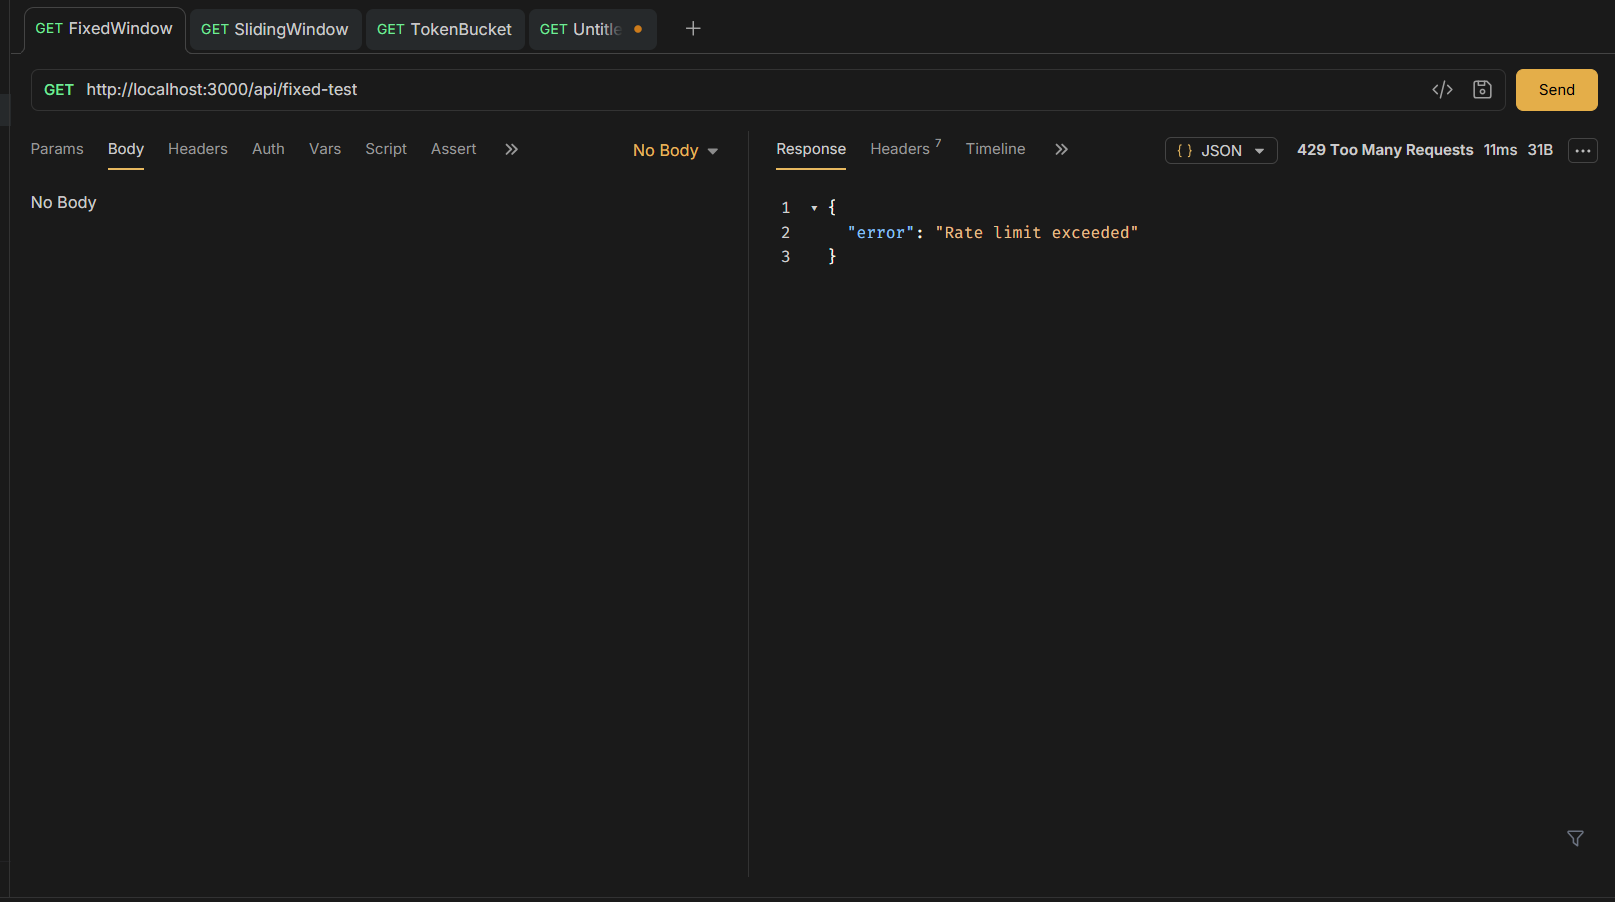
The 429 status code is important because it tells the client that the request was rejected because the client exceeded the allowed request rate.
Automated tests
I also added automated tests using Node.js's built-in test runner.
The tests cover the three algorithms separately:
test/
├── fixed-window.test.js
├── sliding-window.test.js
└── token-bucket.test.js
For Fixed Window and Sliding Window, the tests verify that requests are allowed up to the configured limit, subsequent requests are rejected, and requests become allowed again after the relevant window expires.
For Token Bucket, the tests verify the bucket's initial capacity, rejection after available tokens are consumed, and token availability after refill.
Running:
npm test
runs the test suite through Node.js's built-in test runner.
I also tested the package from its generated npm tarball rather than importing the source directly. This helped verify that the package's public entry point and installation flow worked as expected.
The combination of automated tests and manual HTTP requests made it possible to verify both the algorithm behavior and the Express middleware behavior.
Production Improvements
The implementation works as a single-node rate limiter, but there are several areas that would need attention before treating it as production-ready.
Redis configuration
The current implementation uses a Redis client supplied by the application. In a production environment, the Redis connection should be configurable through environment variables rather than relying on local defaults.
This also makes it easier to use the same rate limiter across different environments.
Key design
The rate limiter needs a consistent way to identify clients.
The current implementation defaults to:
const key = keyGenerator ? keyGenerator(req) : req.ip;
Using a custom keyGenerator makes the middleware more flexible because an application can choose to rate-limit based on something other than an IP address, such as an authenticated user or API key.
When using IP addresses, proxy configuration also needs to be considered so that the application receives the correct client IP.
Atomicity
One of the main lessons from implementing the Sliding Window and Token Bucket algorithms was that the algorithm itself is only part of the problem.
The Redis operations that update the rate-limiter state also need to be considered from a concurrency perspective.
Lua scripts allow the required operations to execute atomically inside Redis, which is particularly important when multiple requests arrive at the same time.
Configuration validation
The middleware validates configuration when rateLimiter() is created rather than repeatedly validating it for every request.
For example, limits and capacities must be positive integers, while windowSize and refillRate must be positive numbers.
This keeps invalid configuration from reaching the request-processing path.
Additional improvements
There are still several areas that could be improved:
Add rate-limit response headers such as
Retry-After.Add automated concurrency tests.
Add more detailed tests for token refill behavior.
Add TTL handling for Token Bucket state to avoid unnecessary long-lived keys.
Make the Redis connection and failure behavior configurable.
Review the client-key strategy for different deployment environments.
Add more comprehensive validation and error handling.
Comparing the Three Algorithms and When to Use Each One
The three algorithms solve the same basic problem controlling request rates but they do it in different ways.
| Algorithm | Redis state | Burst behavior | Accuracy | Main tradeoff |
|---|---|---|---|---|
| Fixed Window | Integer counter | Boundary bursts possible | Basic | Simplest, but coarse boundaries |
| Sliding Window | Sorted-set timestamps | More controlled | Higher | More memory and work |
| Token Bucket | Token amount + timestamp | Bursts up to capacity | Rate-oriented | Refill semantics must be precise |
Fixed Window
Fixed Window is a good choice when simplicity is the priority.
It requires only a counter and an expiration time, making it straightforward to understand and relatively inexpensive to operate.
The tradeoff is the window-boundary problem. Requests can cluster around the boundary between two windows and produce a larger short-term burst than the configured limit suggests.
Sliding Window
Sliding Window provides more precise control because it considers the timestamps of requests that actually occurred within the recent window.
It avoids the fixed-window boundary problem, but this comes with additional Redis state and processing.
In this implementation, Redis Sorted Sets and a Lua script are used to maintain that state atomically.
Token Bucket
Token Bucket is useful when controlled bursts are desirable.
A client can consume several accumulated tokens quickly, up to the bucket's capacity, while the refill rate controls how quickly tokens become available again.
This makes the algorithm different from simply counting requests within a time window. Its behavior depends heavily on correctly implementing the relationship between capacity, elapsed time, and refill rate.
Which one should you choose?
There isn't one algorithm that is always the best choice.
A simple API might be well served by Fixed Window.
When more precise control over a moving time window is important, Sliding Window can be a better fit.
When the system should allow bursts while controlling the longer-term rate, Token Bucket is a useful option.
The important part is understanding the behavior and tradeoffs of the algorithm rather than choosing one simply because it is more sophisticated.
Conclusion and What I Learned
Building this rate limiter started as an exercise in implementing three different algorithms, but the implementation exposed several practical concerns that are easy to miss when looking at the algorithms only as formulas.
The three approaches store and manage state differently:
Fixed Window
→ Counter + expiration

Sliding Window
→ Sorted Set + timestamps + Lua

Token Bucket
→ Tokens + last-refill timestamp + Lua
The project also highlighted how important it is to understand the connection between application code and the data stored in Redis. Things such as Redis data types, key design, time units, expiration, and atomic operations directly affect whether the rate limiter behaves correctly.
The next step for this project is exploring how the design changes when the application is no longer running as a single Node.js instance.
A distributed setup could look like:
                Client
                   |
             Load Balancer
              /     |     \
             /      |      \
        Node.js   Node.js   Node.js
           \        |        /
            \       |       /
             \      |      /
                  Redis
That introduces new questions around load balancing, shared state, API gateways, and distributed systems.
I have not implemented that architecture yet. It is the next area I want to learn and explore based on this foundation.